


13.2 Hierarchical Keywords
NeoFinder has a powerful keyword management and editing solution for your photos, videos, and other files.
Open the Keywords - Controlled Vocabulary in the Window menu.
It will show you a window with a long keywords list or your keyword tree, if you have already used hierarchical keywords.
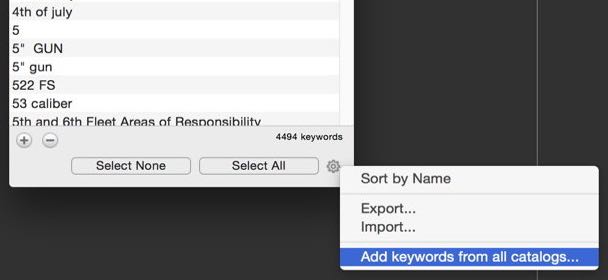
You can quickly add or remove keywords to the list by using the + and - buttons underneath it. Please note that removing keywords this way only removes them from the Controlled Vocabulary, not from the original files. If you need this, use the context menu.
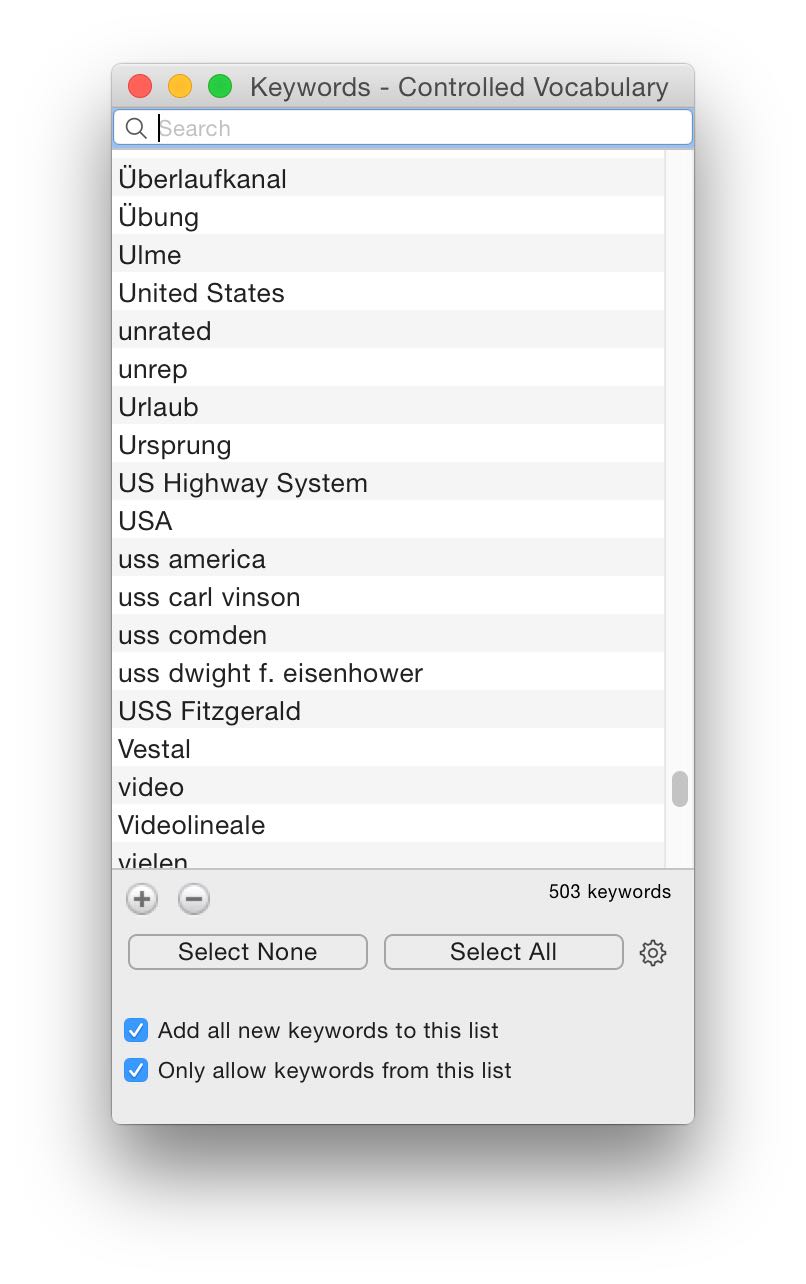
If the list is really long, you probably want to search it, so there is a filter field directly above the list. NeoFinder will show you only those keywords that contain the search string you have entered there.
Underneath the list, NeoFinder also shows you the total number of keywords in that list, and the number of those that the filter currently displays.
Add all new keywords to this list
If you activate this checkbox, NeoFinder will automatically add all new keywords to your controlled vocabulary. Both when you type them in the Inspector, or when you catalog or update a folder or disk and these contain files with new keywords not yet in this list.
Only allow keywords from this list
This option enforces the use of keywords from this list in the Inspector. NeoFinder will only allow you to type or select keywords from this list when you want to add them to items from your catalogs. That is useful to make sure that there are no typos, and only the “official” keywords from this list are used by everywhere.
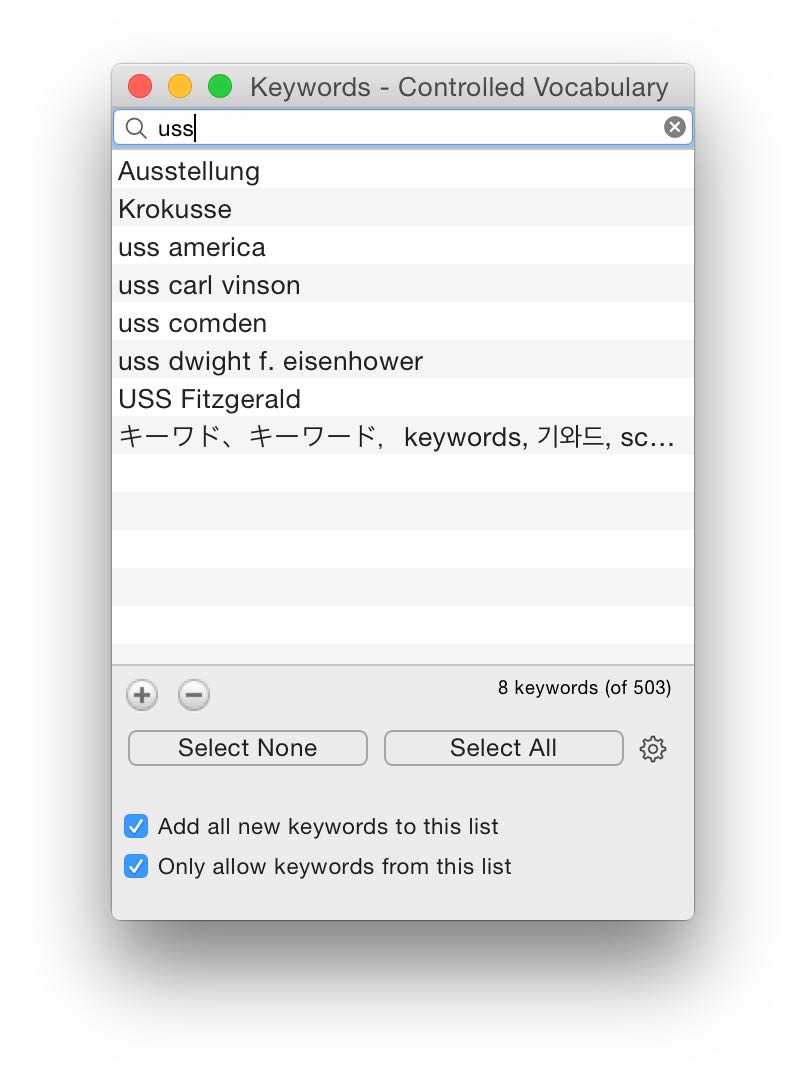
Hierarchical Keywords
With NeoFinder, you can even group keywords together in a hierarchy!
Simply drag any keyword on top of another keyword to add it as a "sub keyword", thus promoting the drag target keyword to a "keyword group"
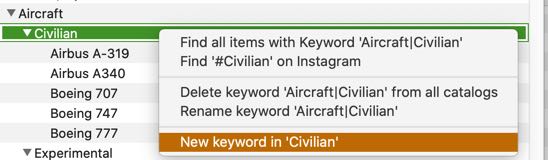
Or use the new context menu command New keyword in '', which will create a new keyword as a "sub keyword" of the selected keyword.
Another option is to use existing and extensive hierarchical keyword lists, such as from here:
https://www.controlledvocabulary.com/products/index.html
Use the Lightroom format, which can be imported and used by NeoFinder as well.
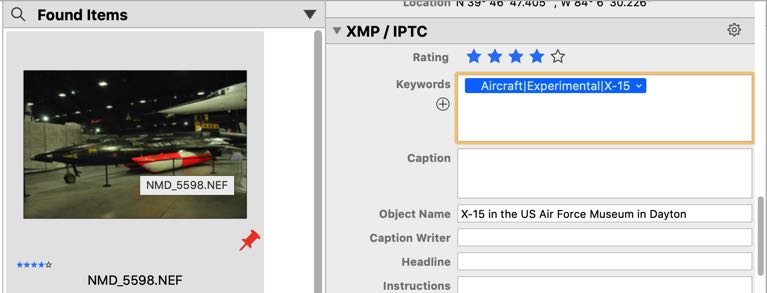
Instead of displaying just the keyword name, NeoFinder will display the hierarchy in the Inspector, concatenating the components with the standard "|" character used for these cases:
If you use NeoFinder for the first time, the keywords list is probably empty. How can you fill it up?
From your catalogs
If you have already cataloged your photos with NeoFinder, or parts of them, you can ask NeoFinder to build a complete list of all the keywords you have already used in these files.
For that, just use the Add keywords from all catalogs... command from the Tools menu. NeoFinder will add them, and make sure there are no duplicates in the list.

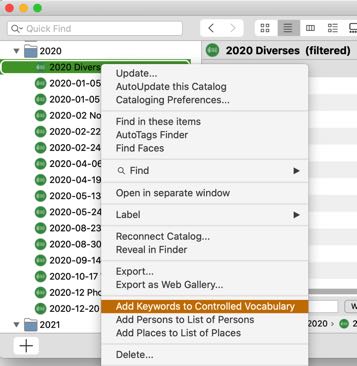
If you need to add only the keywords of one or a few of your NeoFinder catalogs, you can use the context menu in the LIBRARY, for a selected catalog. That will allow you to add all keywords of the selected catalog to the Controlled Vocabulary.
Import from Lightroom or other apps
You can also ask NeoFinder to import a list of keywords from other applications. NeoFinder currently supports two formats. One is a plain text file, with one keyword at each line. You can of course generate such a file yourself with a simple text editor, for example, or as an export from a database.
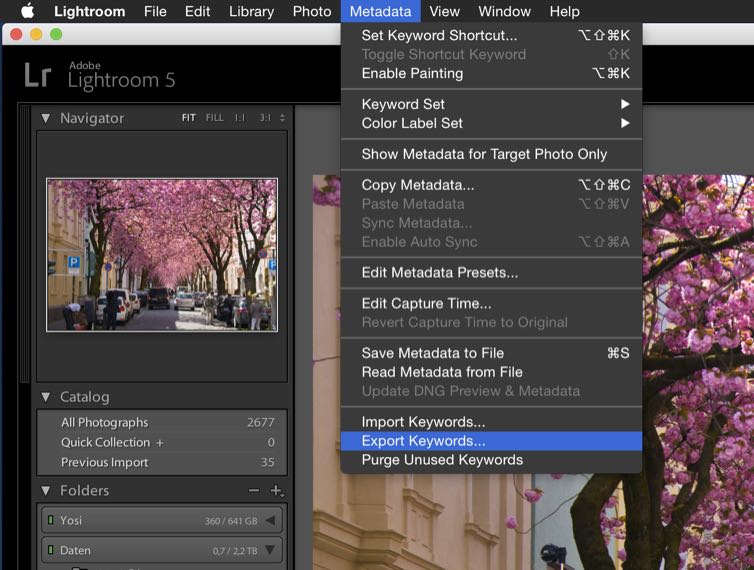
If you use Adobe Lightroom, you can export their Keywords list by using the Export Keywords command in the Lightroom Metadata menu. That will generate a “Lightroom.txt” file that NeoFinder can import for you.
Please note that this Import will add the new keywords to the list, and NeoFinder will make sure there are no duplicates.
In that same menu, you can also sort the entire keywords list in NeoFinder by name.
Of course, you can also Export the entire NeoFinder keywords list as well. NeoFinder will write a special XML format that other NeoFinder copies can read, or also abeMeda 7 for Windows.
Sort keywords
After your list has been filled from your catalogs, or manually, you probably want to sort your keywords by name.
Use the Sort by Name command from the Tools menu. NeoFinder will alphabetically sort your keywords for you then. New keywords are still appended at the end of the list, so you want to repeat that after adding new catalogs later.
How do you use these Keywords in NeoFinder?
The entire Keywords tree will be available for you when you start typing keywords into the Keywords field of the XMP Editor in the Inspector. NeoFinder will show you the possible keyword matches from your list, and you can simply select any such suggestion and have it entered for you.
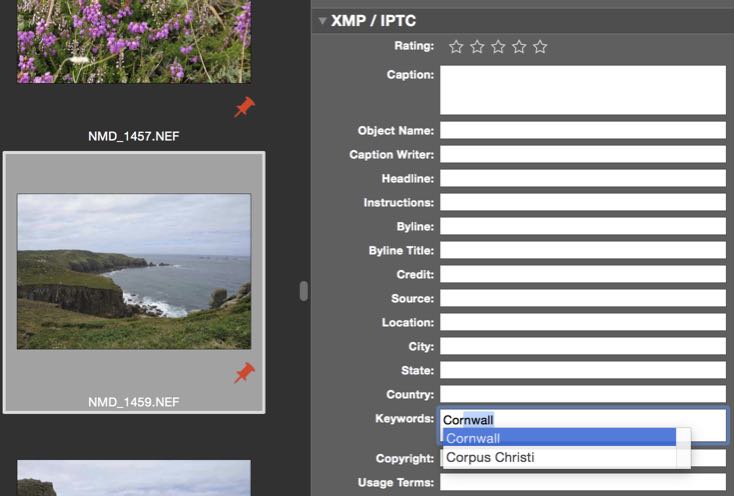
And as the cool XMP Editor in NeoFinder can even handle multiple selected photos at once, you can quickly add your keywords to many files at once.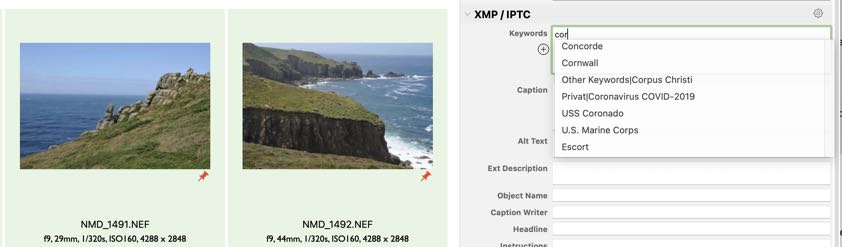
If the above “Only allow keywords from this list” option is enabled, you can only use keywords from the keyword list.
If the above “Add all new keywords to this list” option is selected, any possible new keywords freely entered here are added to your keywords list automatically.
You can type entire complex keyword hierarchies here with the "|" divider character, for example typing "Aircraft|Civilian|Airbus A-380" without the "" will create a group "Aircraft", with an item "Civilian" in it and inside that the keyword "Airbus A-380". Of course, if any of these already exist in your Controlled Vocabulary, they are not created again, but simply used.
Last, you can also drag any keyword from the Keywords list and drop it onto a photo in NeoFinder. That will automatically add that keyword to the photo.
How to remove keywords from photos or movies?
You can edit the Keywords section in the XMP Editor of the Inspector, and add or delete keywords as you please. This works for a single selected photo or video, but also for multiple selected items at once.
Find photos or movies that use a keyword
If you select a keyword in the Keywords list, and use the context menu, you will be able to quickly find all files that use this particular keyword.
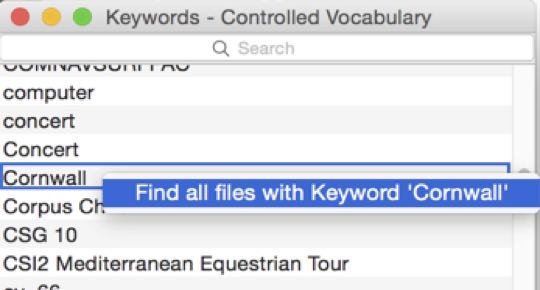
That also works for the Keywords section in the XMP editor of the Inspector.
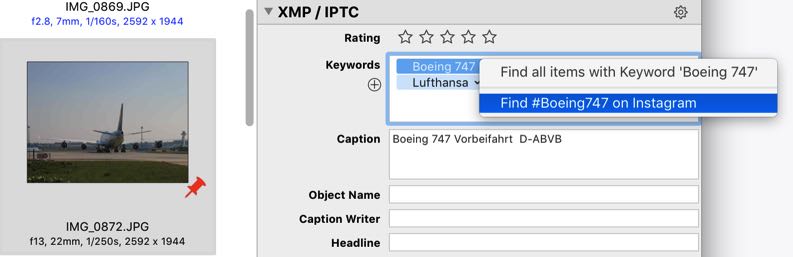
Here, you even have the option to find for a hashtag on Instagram, directly from inside NeoFinder!
Rename a keyword
You can of course rename any keyword in the Controlled Vocabulary list by clicking in it, and edit the name, but that will not change this keyword anywhere else.
To rename a keyword in all catalogs and possibly even all actual files, use the context menu.
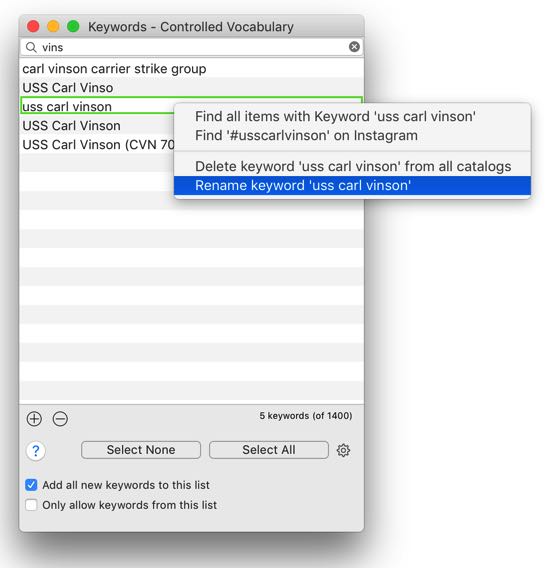
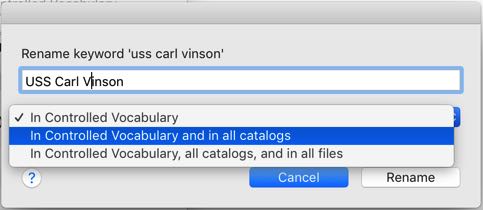
If you select "Rename keyword," a new window will appear, in which you can type the new name of that keyword, and select the change options from the menu.
Share Keywords with other NeoFinder and abeMeda users
Your NeoFinder keywords are stored in a hierarchical text file named Keywords.txt, in the folder Shared.Database.Information, placed inside your active NeoFinder database folder.
This is new, and has a couple of ramifications for you.
First, if you switch between multiple database folders, you can now have different keyword lists for them.
Second, if you use a shared folder on a server for other NeoFinder or abeMeda for Windows users, they will all share the same keywords list.
And last, as that is indeed just a text file, you can edit the data with a different editor, if needed.
Locked Keywords
NeoFinder will detect the access privileges for the new Keywords.txt file, as explained above, and if that file is write protected, it will show a lock icon in the Controlled Vocabulary window.
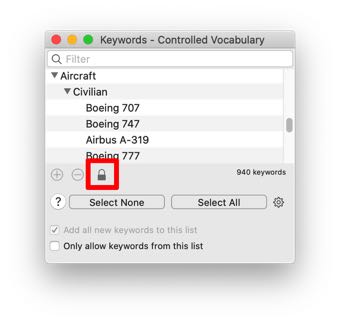
That way you can prevent users from changing the keywords list, and enforce them all to use one official controlled list of keywords.
Add multiple Keywords quickly
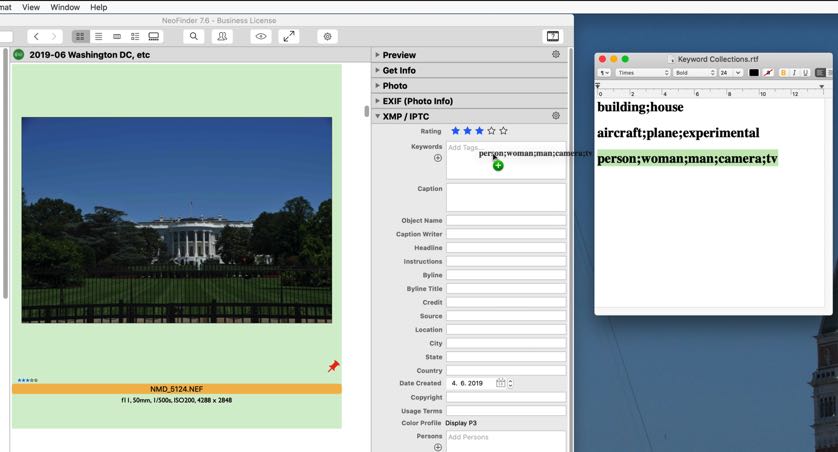
NeoFinder can accept new keywords by drag&drop from any text editor, just drag them into the Finder Tags, or XMP Keywords fields, and NeoFinder will add the selected text as a new keyword.
Also, you can concatenate multiple keywords with a semicolon and drag them to NeoFinder. NeoFinder will separate them, and add these as separate keywords for you.
Please note that NeoFinder will not remove leading or trailing spaces from each keyword, just add the actual keywords with the semicolon, and no extra blanks.
Assign Keywords to multiple selected items quickly
To quickly add one or multiple keywords to many selected photos or videos, simply double click on the selected keywords in the keywords list. NeoFinder will then add these keywords to the XMP metadata of all selected photos or videos for you.
XMP Keywords vs. Finder Tags
People are often confused by the difference of Apples Finder Tags and XMP Keywords.
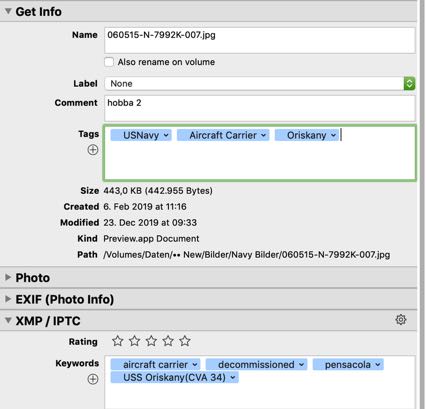
The proprietary Apple Finder Tags can be added to all files and folders in macOS, but can only be used on the Mac, and often won't survive transfer to other devices (even iPhones), and some types of file servers. They can only be viewed and edited by Apples Finder, and some special applications, like NeoFinder. They will be ignored by most photo and video editor tools. Finder Tags cannot be hierarchical, they are only a flat list of keywords.
The cross-platform IPTC/XMP Keywords (Dublin Core) can be added to certain file formats directly, and to most other files into the separate XMP sidecar files, are well documented, and will easily survive the transfer of the files to other devices and platforms. Additionally, the full power of hierarchical keywords can be used with XMP.
For photographers, video producers, or graphic artists, and long-term storage, using XMP keywords is a much better idea. You can still use Finder Tags as well for short term work-flow steps.
Sync keyword list between users
If you have a network installation with multiple users on different Macs and PCs, make sure to use at least version NeoFinder 8.5.2, which synchronizes the global keywords list much better, and is able to detect changes made to the list by other NeoFinder for Mac or abeMeda for Windows instances.
Notes
As NeoFinder only allows you to edit metadata for files that are actually currently online, and thus available, if you don't see these edit fields, make sure that the file you wish to edit is available to NeoFinder, by using the "Reveal in Finder" command, for example.
If a file is write protected, NeoFinder will not be able to edit the metadata for that file. In these cases, please make sure you have permissions to write to the files.
The Keywords column in List View contains a merged list of both the Finder Tags and XMP Keywords of an item.
Notes about the NeoFinder XMP Editor:
Internal and external XMP
NeoFinder writes the XMP data directly into the data file, if the format is supported by Adobes XMP library. Currently this includes these file kinds: JPG, PNG, DNG, MOV, TIFF.
For all other items, NeoFinder will generate a separate XMP file, called the “xmp sidecar file”. It will have the same name as the original data file, but the “.xmp” file name suffix instead of the original file name suffix.
However, you can change that and force NeoFinder to always use "sidecar" files for all formats.
Online only
As NeoFinder will write all changes you make to the XMP data directly to disk, this will only work for files that are currently online. NeoFinder will not just keep your precious data in its catalog, but write it to disk, so that other applications in your workflow can access this data immediately, too. No need to use some kind of extra “write to disk” command or such.
But this will also mean that the XMP editor is only enabled for cataloged items that are actually currently online an available on your computer.
Prevent all editing
In case you certainly do not wish to make any changes at all, there is a special hidden preference to NeoFinder 7 that will turn off all XMP editing.
In Apples Terminal.app, paste the line below and run it:
defaults write de.wfs-apps.neofinder NoChangePlease YES
To enable the XMP editor later, past this command to Console.app, and run it:
defaults write de.wfs-apps.neofinder NoChangePlease NO
More
13.1 The XMP Editor
13.2 Hierarchical Keywords
13.3 Metadata Presets
13.4 Persons
13.5 Annotations
13.6 Places
13.7 Label Menus
13.8 Move Metadata
13.9 EXIF Editor
13.10 More Finder Info